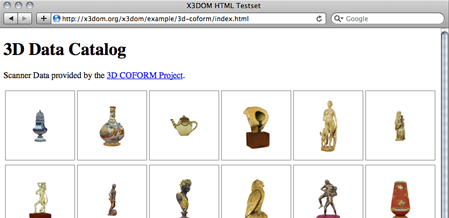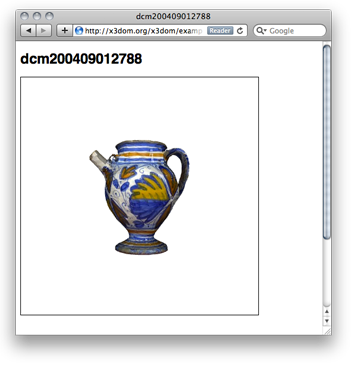
This tutorial describes how to load arbitrary 3D geometry inside your web page with x3dom. We are going to develop an online catalog of 3D objects, that popup inside our page using the popular lightbox overlay principle (click here for the demo). In our case, the 3D objects are X3D files of 3D scanned historical objects. By Jens Keil.
Our main page is only the overview of all objects. Hence, we are going to generate a grid with thumbnail images of our objects. We link these images to a second page with the x3dom content. Since we have 36 objects our grid consists of 6 rows and 6 columns. Let's use a table for that:
<table id="demo_table" class="gallery clearfix >
	<tr>
		<td> <a href="external_html_page"><img /></a> </td>
	</tr>
</table>

As mentioned, our 3D content is displayed inside a lightbox popup. This is a JavaScript based script that is normally used to overlays images inside the current web page. In our case, we are going to overlay a external page with the 3D object in it. We have used the prettyPhoto lightbox version of Stephane Caron, since it features the iframe behavior we need to load a second html file into our main page.
In order to tell the script that our linked content should be opened inside the overlay, we add some parameters at the end of the url. For example:
<a href="dcm200310301737.html?iframe=true&
width=500&height=600" rel="prettyPhoto[iframe]" />
Having finished to set up the grid, we initialize the lightbox script after the table declaration:

Now, let's take a look on the inlined page. We have such a page for every 3D object inside our grid. First, we export the scanned data into the X3D file format. Then we convert the X3D file into a x3dom/html file (see tutorial about generic conversion).
Our X3D decoded 3D content is inside the generated html now. We may add a headline or some textual explanation here; indeed, even any other media we'd like to be displayed inside our lightbox overlay. Note, that adding the script node with a link to x3dom.js at the end is doing all the magic: from declarative X3D/HTML5 to visual 3D content inside your web page.
<html>
  <head></head>
  <body>
    <h1>dcm200409012807</h1>
    <x3d id='someUniqueId' showStat='false' showLog='false' x='0px' y='0px' width='400px' height='400px'>
      <scene DEF='scene'>
        <worldInfo title='dcm200409012807'></worldInfo>
        <navigationInfo headlight='true' type='"EXAMINE"'></navigationInfo>
        <directionalLight on='false' ambientIntensity='1' intensity='0'></directionalLight>
        <transform DEF='ORITGT' rotation='1 1 1 -2.094'>
          <shape>
            <appearance>
              <imageTexture url='"dcm200409012807_texture.0.jpg"'></imageTexture>
            </appearance>
            <indexedFaceSet texCoordIndex=' ... ' />
              <coordinate DEF="COORD" point=' ... ' /></textureCoordinate>
            </indexedFaceSet>
          </shape>
        </transform>
        <background skyColor='1 1 1'></background>
        <viewpoint position='0 0 4'></viewpoint>
      </scene>
    </x3d>
    <script type='text/javascript' src='../x3dom.js'></script>
  </body>
</html>
This tutorial explained how to generate a grid of 3D object inside a web page. Clicking on a thumbnail image opens the 3D object inside a lightbox popup within the current page. Rendering as well as basic navigation is handled by the x3dom Javascript back end. More tutorials can be found here.